You’ve gotten your garden all cleaned out and ready for winter, but what about cleaning and disinfecting your garden tools? Don’t let forgetting this simple fall chore cause you regret when spring rolls around!
When it comes to gardening, dirt and messes go hand-in-hand. While you can wear gloves and use kneeling pads to help you stay clean, your garden tools don’t have it that easy.
But why would you need to clean your tools? They are only going to get dirty again next spring right? Why waste your time and energy?

Unfortunately, leaving your garden tools to stay dirty over the fall and winter months increases the chance that they rust and end up ruined. Those dirty tools can also transmit unwanted diseases and other issues to your plants and trees when you go to use them again.
By taking a few simple steps this fall, you can help to improve the longevity of your tools. You can also help the health of your garden plants as well.
Why Is Cleaning So Important?
From shovels to rakes to pruners and trowels, gardeners are known for having multiple different tools. These tools help to make a gardener’s job easier and help to maintain a healthy and productive garden.
Most of these garden tools are made of metal or a similar corrosive material. Metal can rust and break down if mud and other garden byproducts are left to hang out for months on end. This rusting can cause actual pieces of metal to break off or can damage sharp and smooth blades.
Wooden tools can dry out, split, and splinter. Even plastic tools can get damaged from a full season of hard use. The tools will then be either too dangerous to use or completely useless.
Sure, you can spend money replacing broken or damaged tools year after year. But wouldn’t it be easier (and cheaper!) to clean the items you already own?
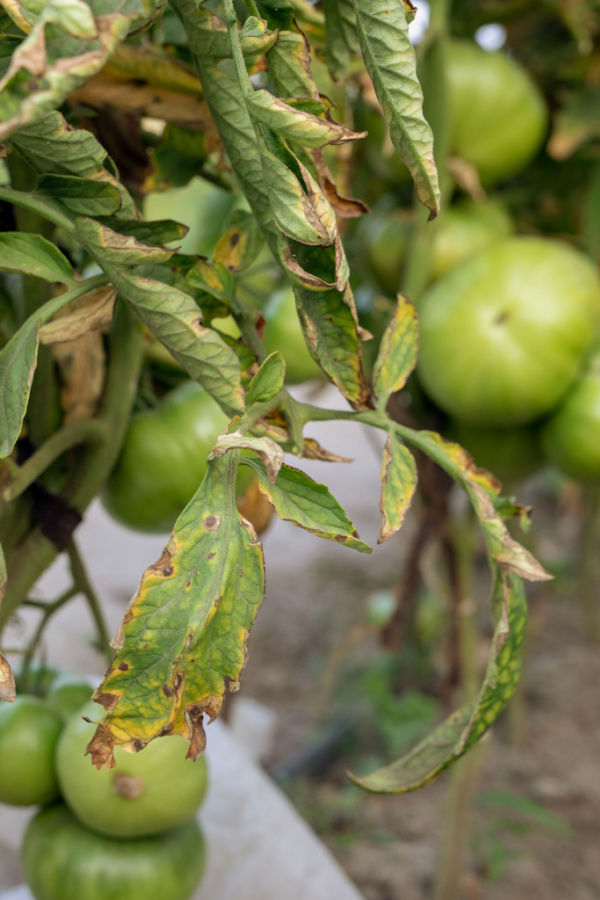
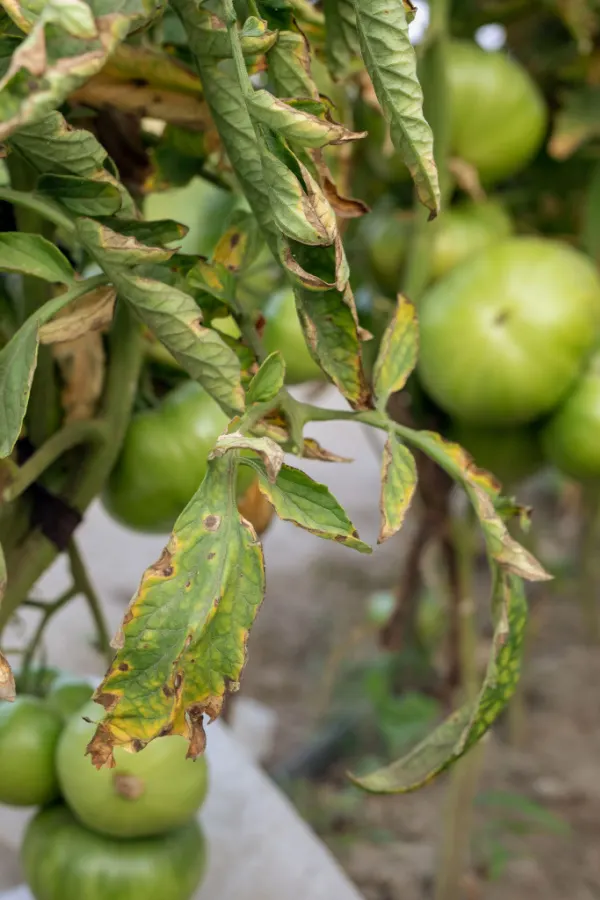
As mentioned above, you also have to worry about the transmission of diseases. Bacteria, viruses, and fungi can all live in the soil and plant debris that might be stuck on your tools. Disinfecting those tools can ensure that any issues you have with your current garden aren’t carried over to next year.
Now that you know why you should clean and disinfect your tools, let’s find out just how easy it is to do.
How To Clean & Disinfect Your Garden Tools This Fall
While you should be cleaning your tools after each use, it’s understandable that it doesn’t always happen. Gardeners get busy, life happens, and you can’t always get the job of a thorough cleaning done. That’s where a deep cleaning and disinfecting in the fall before storage comes into play.
Wash The Tools – Cleaning and Disinfecting Garden Tools
The first step in cleaning your tools is to thoroughly wash off all of the mud, soil, and debris that might be stuck on them. Use a soap or detergent and a brush to help remove any really grimy surfaces.
Sometimes, even using the “jet” option on your hose sprayer will be enough to get the worse of the debris off of the tools. If your tool is able to be taken apart, do so to make sure you are getting all of the cracks and crevices clean.
Overly Dirty Tools
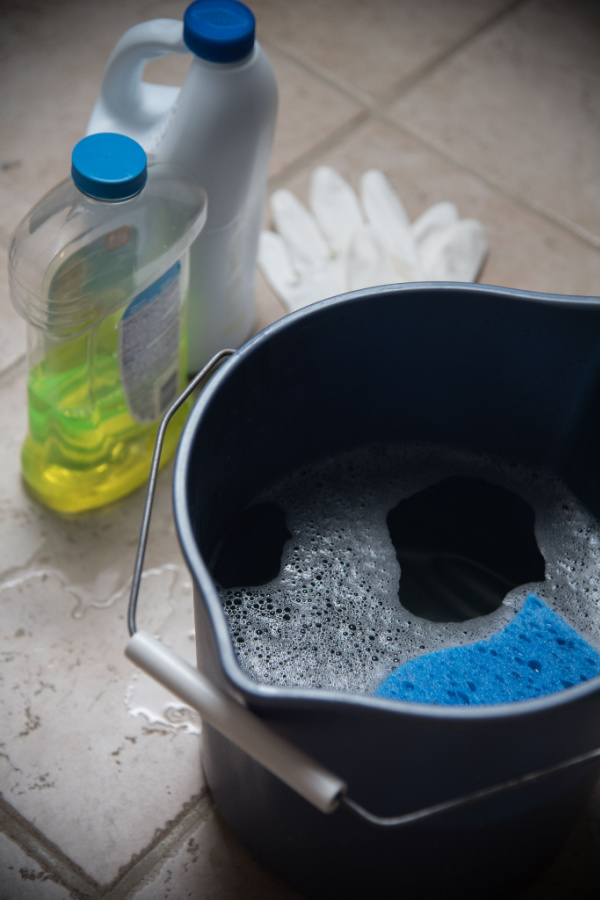
If you’ve let the tools go a while before a good cleaning, you might have to soak them for a bit in soapy water. Before soaking, use a putty knife to try to remove as much of the caked-on soil as possible. A paste of baking soda and water can also help break down stuck-on messes with the help of a bit of elbow grease.
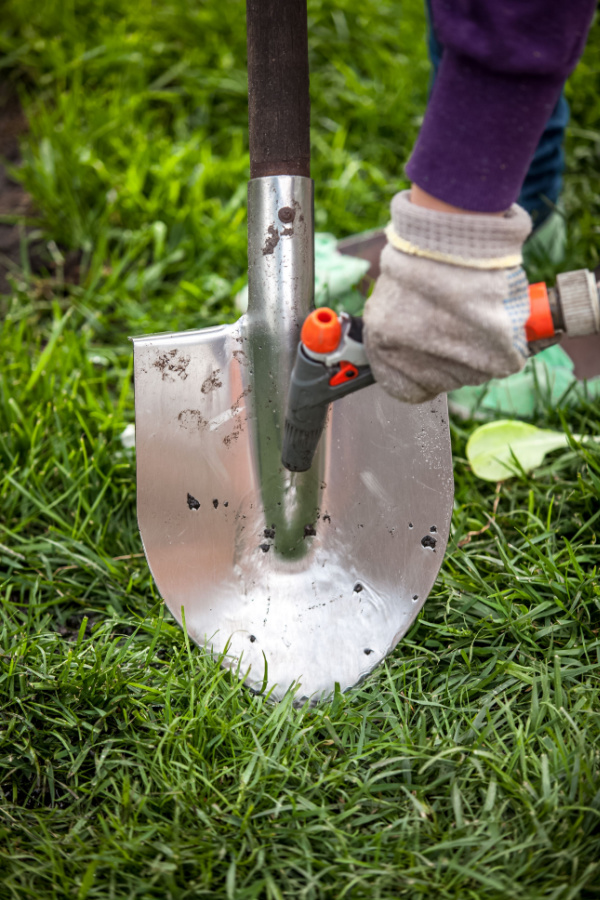

Then, fill a 5-gallon bucket with warm water and a squirt or two of dishwashing liquid. Let the tools soak for around 30 minutes. Remove and rinse them well with water.
Dry Thoroughly
After the wash cycle comes the rinse and dry. Be sure to remove as much of the soap or detergent as possible and allow the tools to dry completely.
If it’s a warm, sunny day, letting the tools air dry is completely acceptable. If not, use a towel or microfiber cloth to dry the tools as much as possible. Storing wet tools will likely end up with rusted tools.
Inspect Each Tool Closely – Cleaning and Disinfecting Garden Tools
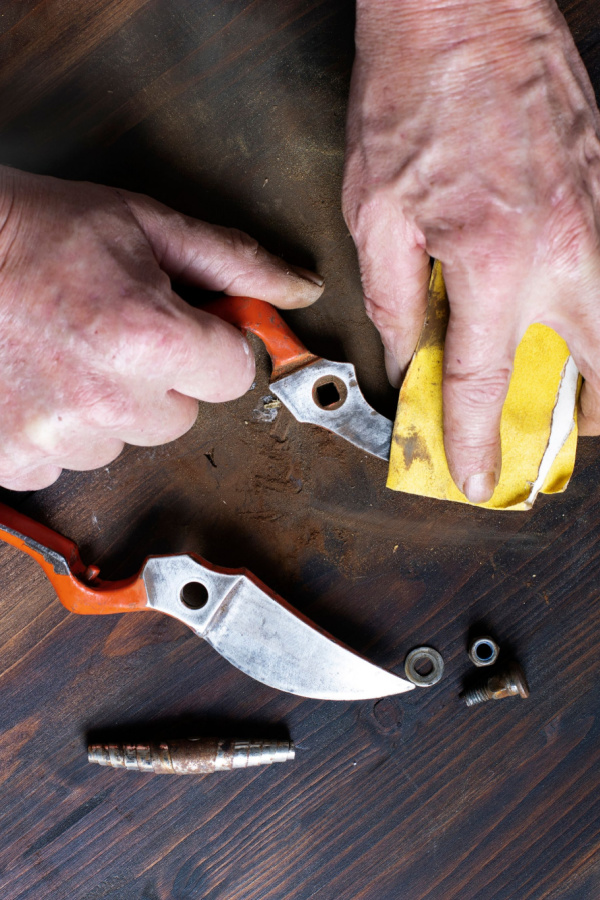
Now that your tools are shiny and clean, it’s time to give them a good look over. Check each one for missing parts, loose pieces, or existing rust. Steel wool or a stiff wire brush can be used to remove rusted areas.
Tighten any loose pieces when possible. Sometimes all it takes is a simple turn or two of a screwdriver. You can even take the tool apart and do a really thorough cleaning as long as you are comfortable with reassembling it correctly.
If any of your tools are past their prime, toss them in the trash or recycle the pieces if possible. (The good thing about going through your tools in the fall is that you have time to get in on those holiday shopping deals if you have any that need to be replaced!)
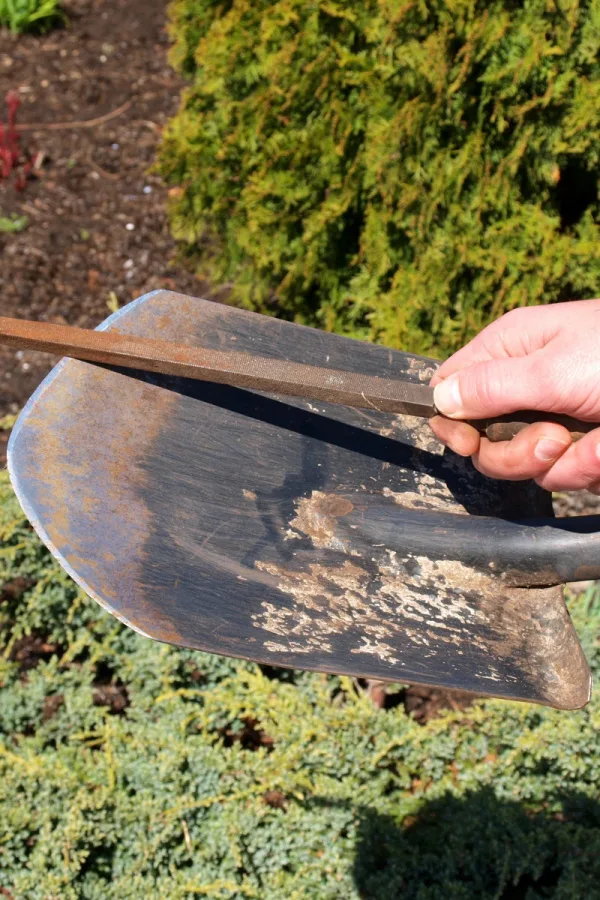
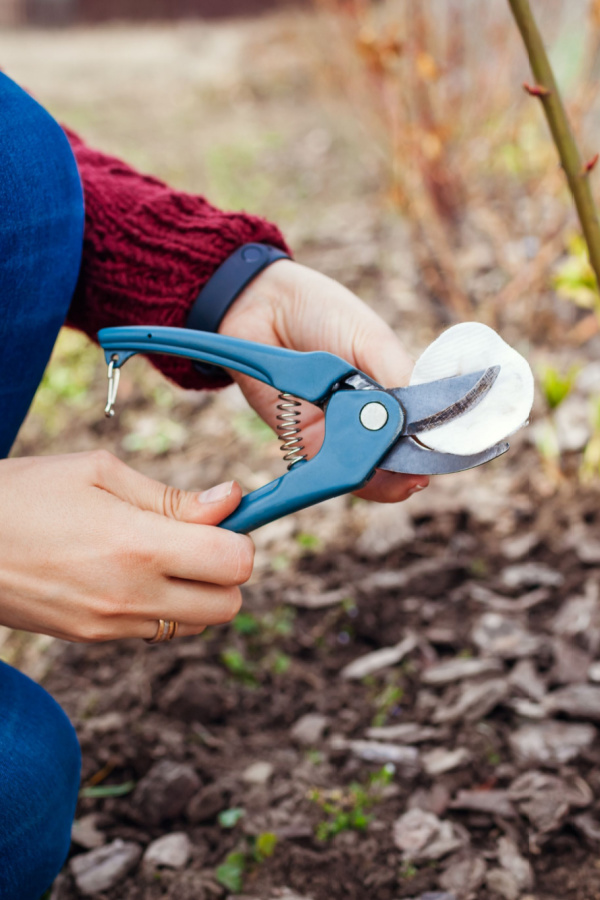
Sharpening Blades & Cutting Edges
Most garden tools have some sort of sharp edge or point to help accomplish a task. If your tools are starting to be a little dull or blunt and not slicing through the soil or plants as they should be, it might be time for a sharpening.

Pruners, shears, and other cutting tools can’t perform their jobs properly if their blades are dull. In fact, using a dull cutting tool on plants can actually cause damage and increase the chances of diseases making their way to the plants.
Shovels and spades will work better if their edges are nice and smooth. Even your heavy-duty rake can benefit from a bit of sharpening of the tines occasionally.
Before sharpening, it’s best to wipe the blades or edges down with a bit of machine oil, penetrating oil, or even vegetable oil works well. Note the angle of the edges and try to maintain that same angle as you sharpen.
High-grit sandpaper can be used for smaller tools like shears or trowels. It can also be useful for hoes or even getting around the tines on heavy-duty rakes. For larger tools like shovels and spades, use a large metal file or a grinder to resharpen and smooth rough spots.
Be sure to wear the appropriate safety gear while sharpening tools and sweep up any metal shavings.
Disinfecting Time – Cleaning and Disinfecting Garden Tools
Now is probably the most important part of the cleaning process – Disinfecting. Just like you need to use hand sanitizer or other disinfectants to help clean your hands, your tools also need the same protection.

This is especially important if you had any type of bacterial or fungal issues with your garden plants this year. While you were hopefully already disinfecting the tools after each use when using them on the diseased plants, you also need to do it in the fall before storing all your tools.
There are many different ways to disinfect your tools. Choose one that fits your needs and situation. Handle all disinfecting methods with caution and care.
Vinegar
Plastic, stainless steel, and sealed woods are all safe to be disinfected with the infamous household do-it-all-cleaner, vinegar. Between helping to kill weeds to stopping ground moles to making delicious dill pickles, there doesn’t seem to be much that vinegar can’t do!
A great advantage of vinegar is that it is pet and kid-friendly. In addition, vinegar is also safer and less toxic to the environment than manufactured disinfectants or bleach.
Use vinegar at either full strength or as a 1-to-1 ratio with water. Submerge the ends of your tools in the solution in a 5-gallon bucket. Be sure to cover all parts of the working ends with the solution and allow it to soak for 10 to 15 minutes. When the time is up, take the tools out and allow them to air dry completely.
Word of caution: Don’t use vinegar on stone tools or near your working surface if it is covered in stone. In addition, only use it on properly sealed wood and only for a short time. Also, vinegar can still kill grasses and some plants, so take caution when using it.

Bleach
If you are wanting something a bit stronger for disinfecting, you can use a simple solution of water and bleach. Use one part bleach to 9 parts warm water – this gives you a 10% bleach solution.
If tools are small enough, dunk them in a bucket of the solution and allow them to sit for a minute or two. Remove and allow to air dry.
For larger tools, you can either use a spray bottle or a moistened paper towel to wipe down the tools. Allow to air dry naturally.
Be sure to use proper gloves and eye protection when using bleach products and apply them in a well-ventilated area. Never mix bleach with vinegar or any other cleaning product.
Rubbing Alcohol
Using rubbing alcohol is also a great way to disinfect tools and might not be as harsh as bleach. Just moisten a paper towel with rubbing alcohol or use a disinfecting wipe and wipe down the tools from top to bottom. Make sure the tool is damp when applying and allow it to air dry.
Adding Oil – Cleaning and Disinfecting Garden Tools
Now that your tools are properly cleaned and disinfected, it’s time for just a few small additional steps. For garden tools that have moving parts like clippers or pruners, use oil to help keep the parts lubricated and moving freely. It doesn’t take much but the oil can make a big difference and keep your tools working correctly.

Any of the above-mentioned oils that you would use for sharpening blades also work well on the moving parts. You can also use mineral oils, teak oil, or lubricating oils. You only need a light coat and be sure to wipe all sides of the tool.
Wooden Handles & Tools
If you have any tools that have wooden handles, you need to help prevent the wood from drying, splitting, or cracking.
Lightly sand the wood down with medium-grit sandpaper. This helps to smooth down any rough spots and also helps remove possible splinters.
Go over the handle again with fine-grit sandpaper. Wipe off any dust with a microfiber cloth or a slightly damp paper towel. Once completely dry, rub the wood down with linseed oil prior to storing. This will give the wood a nice protective layer to help prevent moisture from ruining it.
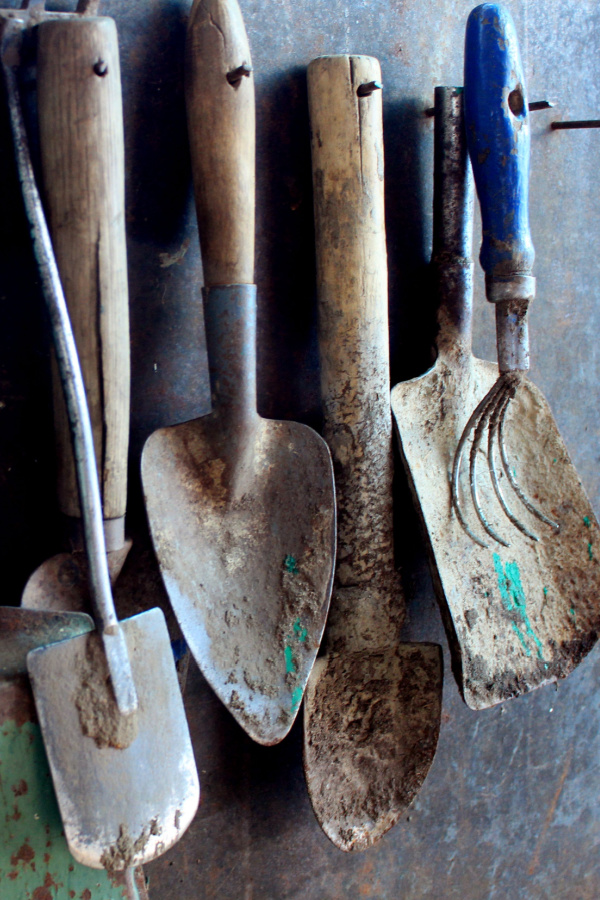
Proper Storage – Cleaning and Disinfecting Garden Tools
Along with cleaning and disinfecting your garden tools comes proper storage during the winter months as well. If you take all of that time to get your tools in tip-top shape and then leave them leaning against your garden fence, your efforts will all be for nothing.
Having the proper storage space for your tools also helps ensure that they won’t have issues with bowing, breaking, or warping. You don’t need to have a dedicated garden shed, but anywhere that the tools can be kept out of the elements and dry will help prolong the life of the tools.
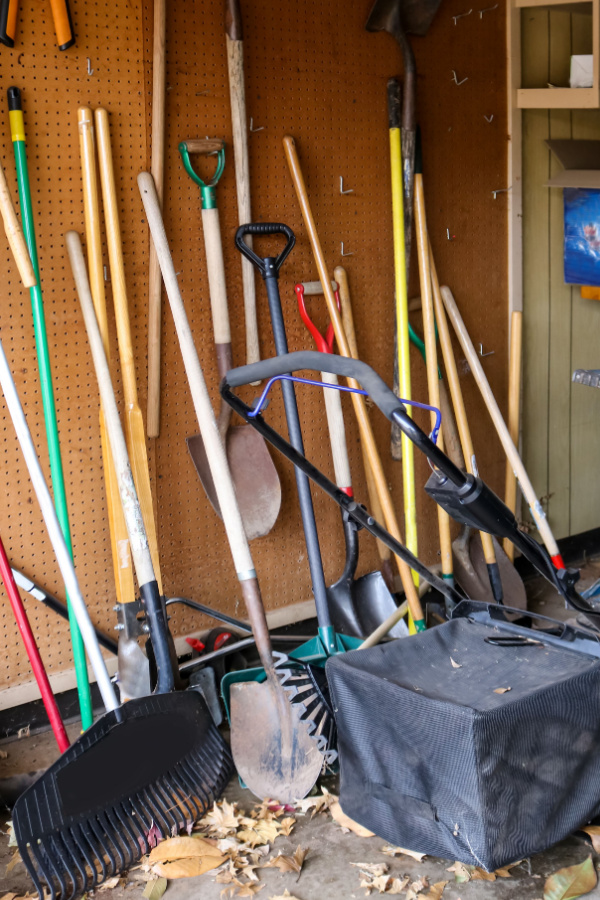

Pegboards work well for storing all sorts of garden tools – small and large. Allowing the tools to hang instead of leaning in the corner of a shed will help prevent bowing or warping. It will also quickly allow you to see if you have any tools missing.
While properly cleaning and disinfecting your garden tools might take a small amount of your time and effort, it is well worth it. Your spring gardener self will thank you when the weather starts to warm up and the gardening season begins again!
Follow Our Facebook Page For Even More Great Tips! Simple Garden Life Facebook Page
Simple Garden Life is a website dedicated to keeping gardening fun, simple and enjoyable! We publish two new articles each week along with a new garden podcast episode every two weeks. This article may contain affiliate links.