The Easiest Way To Save Coffee Grounds For Your Garden This Winter - Without Having Them Mold!
Tired of trying to save coffee grounds in the winter - only to have them mold by the time you go to use them?
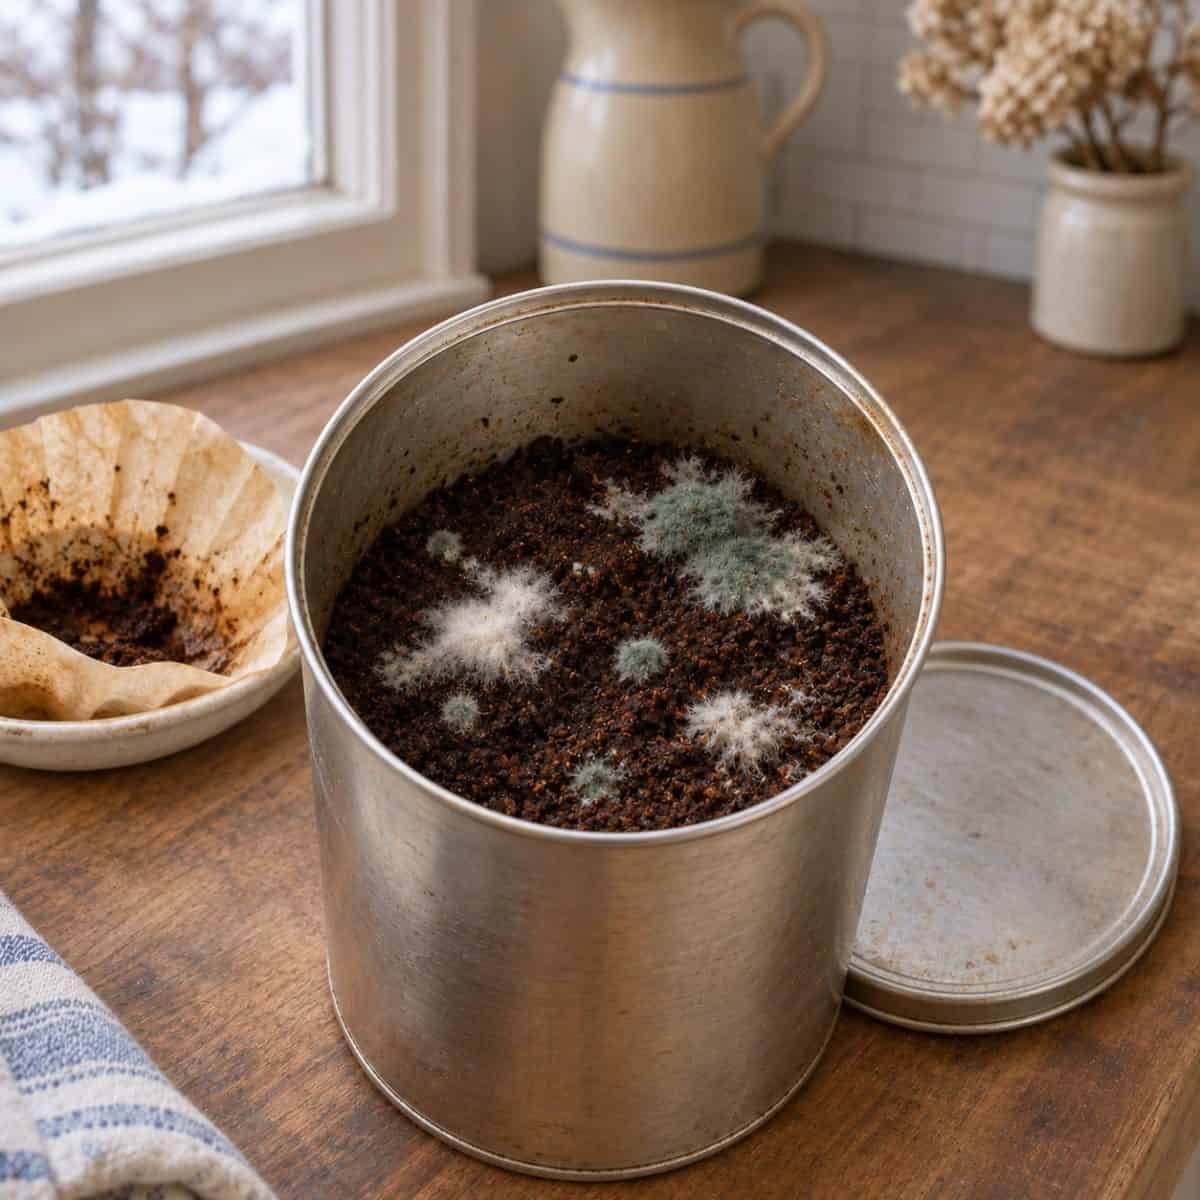
This is usually how it goes - you dump the first few batches into a container, tuck it under the sink, and add to it every morning. Then one day you lift the lid and find a fuzzy layer of mold where your nice pile of coffee grounds used to be.
It’s easy to see why so many gardeners give up on saving them. A pot of coffee produces just a little at a time, but over a whole winter, those daily batches can add up to several bags of material for your garden, flowerbeds or compost pile. The challenge is finding a way to keep them until spring without turning it into another kitchen chore.
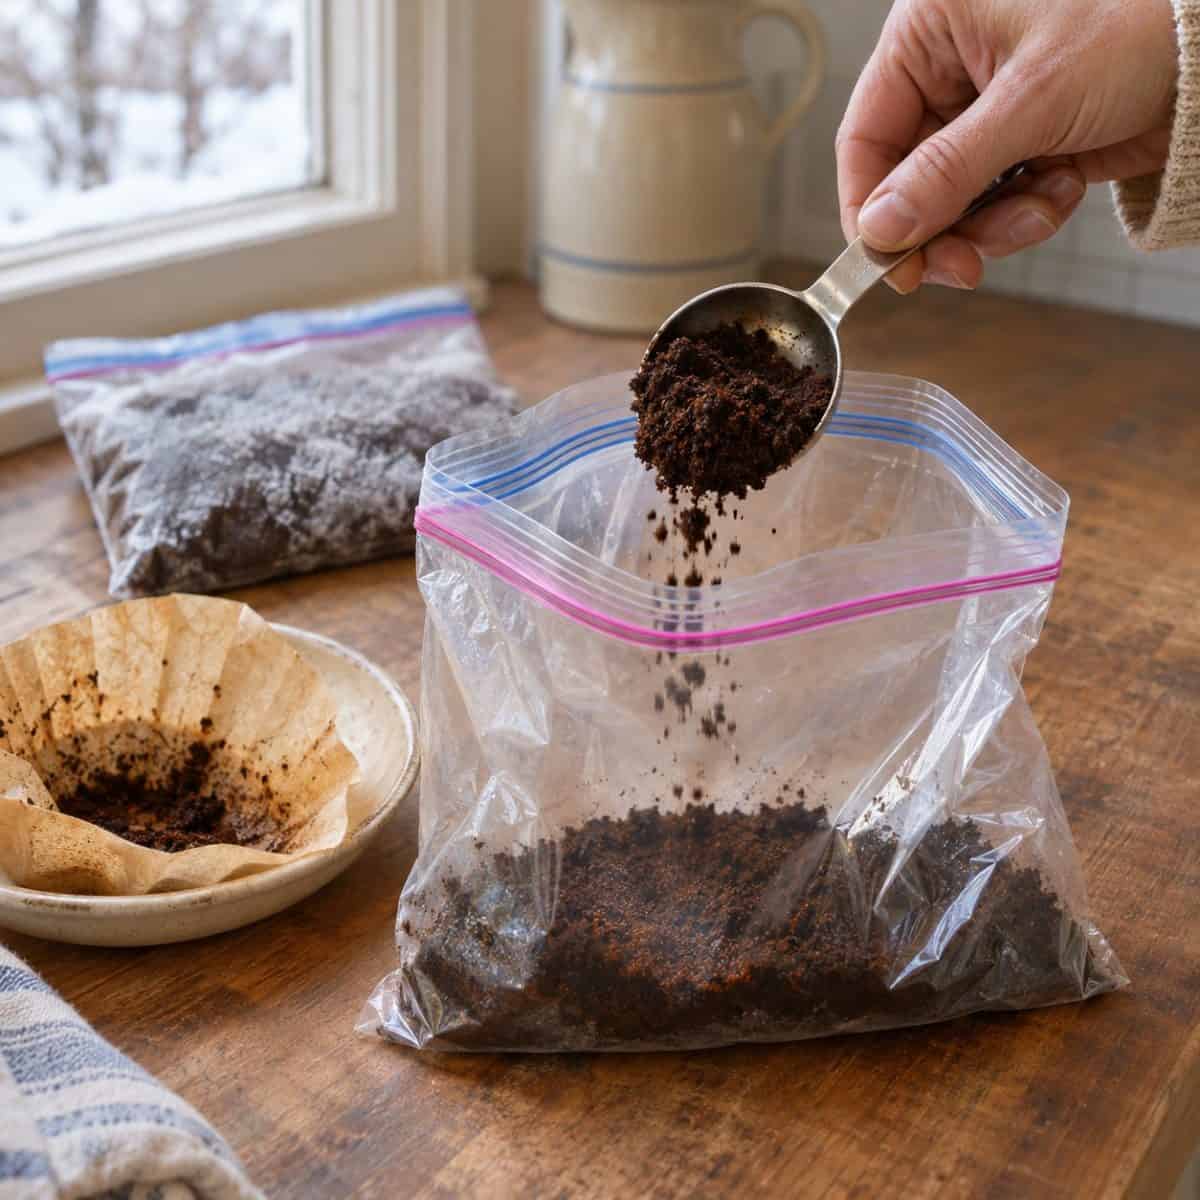
The easiest solution? Freeze them! Just simply keep a zip-top freezer bag handy, add your used grounds as they cool, and put the bag right back in the freezer. You can keep adding to the same bag until it’s full, then start another one. There’s no need to spread the grounds out on a tray or wait for them to dry.
The Easiest Way To Save Coffee Grounds - Without The Mold
Why Coffee Grounds Mold So Quickly In A Container
Used coffee grounds hold a surprising amount of moisture. They might look fairly dry when you knock them out of the filter, but squeeze a small handful and you’ll see how easily they clump together.
Once that damp material goes into a jar, bucket or plastic tub at room temperature, it has the conditions mold needs to grow.
Putting a tight lid on the container can keep the smell in, but it also keeps the moisture in. And every time you add another batch, you’re adding more damp grounds to the mix.
Even leaving the lid off may only dry the surface. The grounds underneath can still be wet, especially once the container is a few inches deep.
Freezing takes care of the storage problem without requiring you to remove all that moisture first. As long as the grounds stay frozen, mold growth is held in check. That means you can save them a scoop at a time from the first cold days of fall until you’re ready to get back out to the garden in spring.
How To Freeze Used Coffee Grounds In A Zip-Top Freezer Bag
To save coffee grounds without the mold - start with a quart- or gallon-size zip-top freezer bag. A quart bag is easy to fit into a crowded freezer and gives you a smaller batch to work with in spring. If you brew a full pot every morning or have plenty of freezer space, a gallon bag works well too. Affiliate Link: Basics Freezer Gallon Bags, 90 Count
After brewing, let the grounds cool and give any extra coffee a chance to drain through the filter. Then tip the grounds into the freezer bag. They can still be damp. If there’s liquid pooling in the filter, let it drain a little longer. This way you’re saving grounds instead of filling the bag with extra ice.
Press out most of the air, zip the bag closed and lay it flat in the freezer. When you make another pot, pull the bag out just long enough to add the next cooled batch. Seal it and put it straight back.
There’s no reason to thaw the grounds already in the bag. Just drop the new grounds on top and let them freeze in place. Leave enough room at the top to close the zipper easily.
A few grounds caught in the track can make the bag hard to seal, so brush them away before closing it. Once the bag is full, label it “coffee grounds for compost” and start a fresh one.
Listen To Our Garden Podcast Below

Keep The Bags Flat So They’re Easier To Use In Spring
A bag that freezes in a thin, flat layer takes up less room than one that freezes into a lump. You can stack the finished bags on a freezer shelf or slide them upright into a freezer bin once they’re solid.
There’s a payoff in spring, too. A thin sheet of grounds softens faster than a solid block, so it’s easier to crumble and mix into compost. If you only want to use a little at a time, smaller bags make that especially simple.
If you use a paper coffee filter, you can toss it into your compost with the grounds. For freezer storage, though, it’s easier to empty the grounds into the bag and keep the filters separate. The bags stack more neatly without wet paper folded up inside them.
Why Freezing Is Easier Than Drying Coffee Grounds
Drying works if you have a place to spread the grounds out and enough time to get them completely dry. You need to break up the clumps, spread them in a thin layer and check that the middle is dry before you put them away.
A batch can look dry on top while the grounds underneath are still damp enough to mold in storage. In winter, when there may be little warm outdoor space to dry them, it can mean giving up a spot on the kitchen counter day after day.
With the freezer method, the only thing you have to wait for is the grounds to cool. If you empty the filter when you wash the coffee pot, adding them to the bag takes just a few seconds. And if you miss a day, you can pick up with the next pot without having a half-dried batch to deal with.
What To Do With Your Frozen Coffee Grounds In Spring
When you’re ready to using your grounds in the spring - take out a bag and let it soften enough to break apart. Do it on the day you plan to use the grounds. Once they thaw, they’re damp again, and leaving the bag on the counter for days brings back the same mold problem you avoided all winter.
Here is to saving one of the most useful and free soil amendments around - all without the mold! For more great winter uses of grounds, check out our article: 4 Easy Ways To Use Coffee Grounds In The Winter.
The Simple Garden Life
Follow Our Facebook Page For Even More Great Tips! Simple Garden Life Facebook Page
Simple Garden Life is a website dedicated to keeping gardening fun, simple and enjoyable! We publish two new articles each week along with a new garden podcast episode every two weeks. This article may contain affiliate links.