When you plant and grow tulips from bulbs in the Fall, you won’t be disappointed with the beautiful blooms that appear in Early Spring!
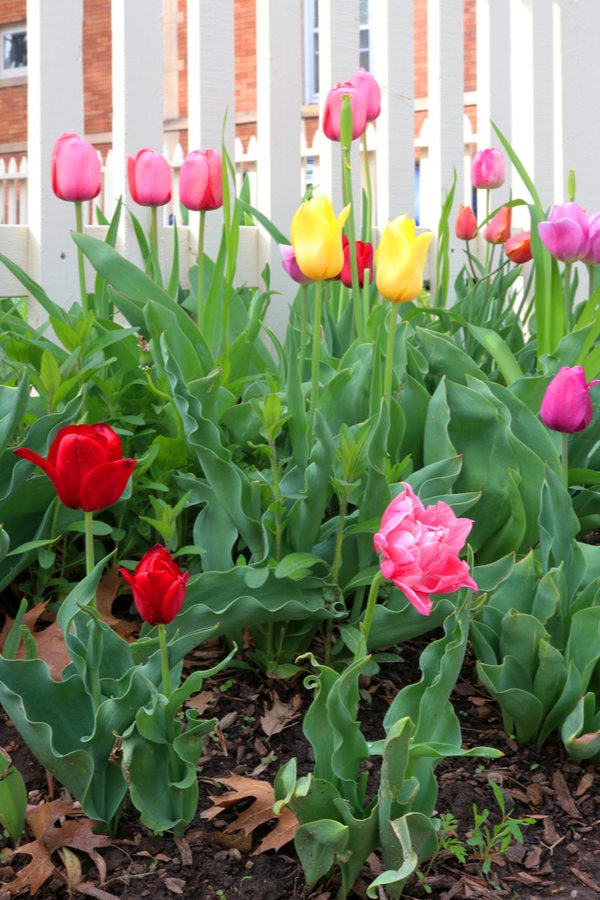
After a long, cold winter, it is always refreshing to see those first little hints of green popping up through the barren soil. Then, in early Spring, you are rewarded with colorful, brilliant blooms on top of strong, sturdy stems.

Tulips are grown by planting bulbs in late Fall. Each bulb will equal one tulip bloom. The colorful blooms stand on top of long, thick stems with two to six leaves per plant.
Tulips are winter hardy in zones 3-8. You can find your own Growing Zone by visiting Here.
They can bloom anywhere from March to May, depending on the variety. Planting a variety of different types ensures you can enjoy blooms all Spring long.
Are Tulips Annuals Or Perennials?
Tulips are technically perennials, but many gardeners treat them as annuals since they can be hard to bloom the second year. Typically, only 75% of the bulbs you plant will come back the second year, and even less will come back in subsequent years.
The best part: planting, growing, and maintaining tulip bulbs couldn’t be any easier either. Especially when following these simple tips and suggestions:
Varieties of Tulips – How To Grow Tulips
There are over 3,000 registered varieties of tulips! Those varieties are grouped into 15 different categories based on their height, bloom type, and blooming season.
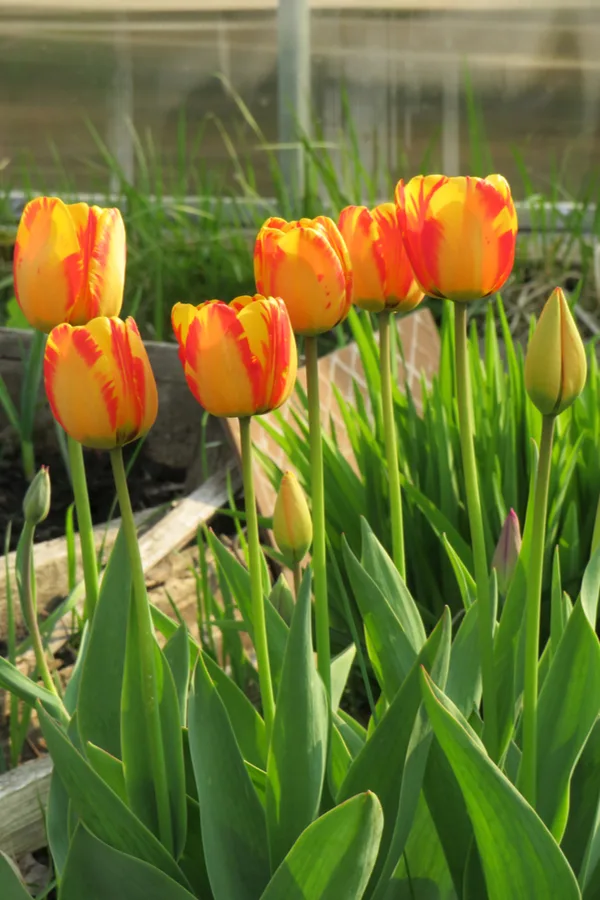
Some of the more popular varieties include Single, Double, Parrot, Triumph, and Darwin Hybrid tulips. The bloom shapes are either Single, Double, Fringed, Ruffled, or Lily-Shaped.
As well as having a variety of different bloom styles, tulips also come in a variety of different colors from red, orange, yellow, green, pink, purple, white, and even multicolored!
Tulips can range in size from 6 inches to around 2 feet tall. So there’s definitely a variety and style for every taste and location.

How To Plant, Grow, And Maintain Tulips
Soil Requirements for Tulips
Tulips dislike being in areas of excessive moisture, so plant in an area with well-draining, fertile soil. The soil can even be slightly dry or sandy. Amend clay or dense soils with sand, compost, or other rough organic matter to allow for better drainage.
Tulips also prefer neutral or slightly acidic soil. Soil temperatures should be at least 60º Fahrenheit (15º Celcius) or lower.
Planting Tulips
When To Plant
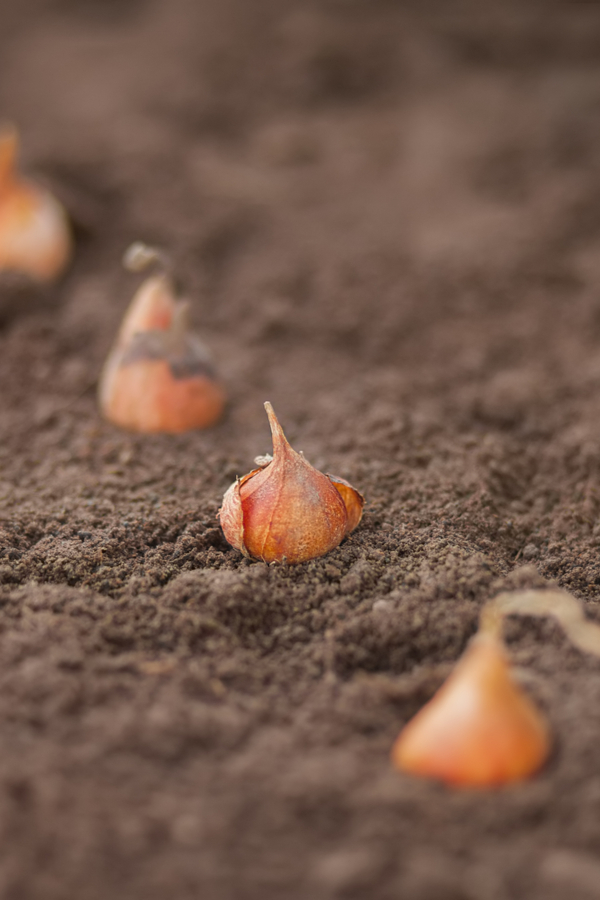
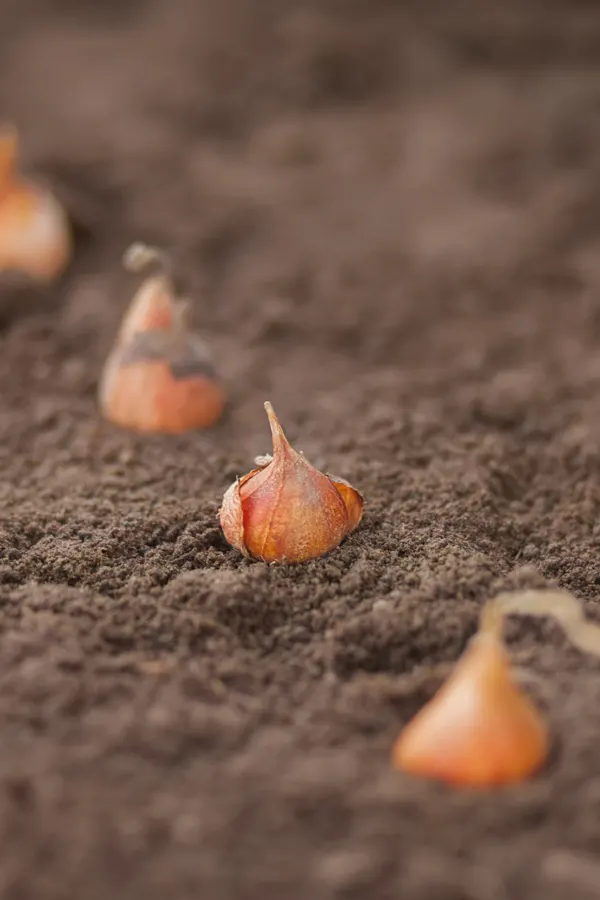
Tulips are planted as bulbs instead of seeds. Once you receive the bulbs, you should get them into the ground as soon as possible. If you have to wait until it is cool enough, store bulbs in a paper bag in a cool place. Your fridge’s crisper drawer actually works perfectly for this.
Ideally, overnight temperatures should range from 40 to 50º Fahrenheit (4 to 10º Celcius) when planting.
You can plant them as late in the Fall as possible as long as they are in the ground 6 weeks before the first hard freeze. This typically lands around September to October in the Northern states and around December or even later in the Southern, warmer states.
How To Plant
Choose a location that receives full afternoon sun (at least 6 hours).
Before planting, loosen the soil to around 12-15 inches deep, adding in a few inches of compost or worm castings. (Listen to our podcast all about using Worm Castings To Power Your Plants) In addition, consider adding in bone meal or a fertilizer specifically for tulip bulbs.
Place the tulip bulbs in fairly deep – about 2 or 3 times the height of the bulb. Another rule of thumb is to plant them 3 to 4 times the width of the bulb (or around 6-8 inches deep). They can be a little less deep in clay or heavy soils.
The bulbs need to be placed with the pointy end up and spaced about 2 to 6 inches apart. Cover with soil and press firmly. Water the soil just to help settle everything nice and tight around the bulb.
Some gardeners have issues with mice and moles eating the bulbs. If this is the case, consider adding in some type of thorny leaves, clean kitty litter, or crushed gravel into the planting hole before you cover it with soil.
Fall and Winter Bulb Care
Cover the newly planted bulbs with a couple of inches of mulch. Straw, pine chips, or shredded leaves all work excellent for this to help insulate the bulbs throughout the winter.
Water bulbs weekly if it doesn’t rain, but stop as soon as the ground freezes.
Now all you have to do is wait until the ground thaws out in early Spring!

Long-Term Care In The Spring – How To Grow and Maintain Tulips
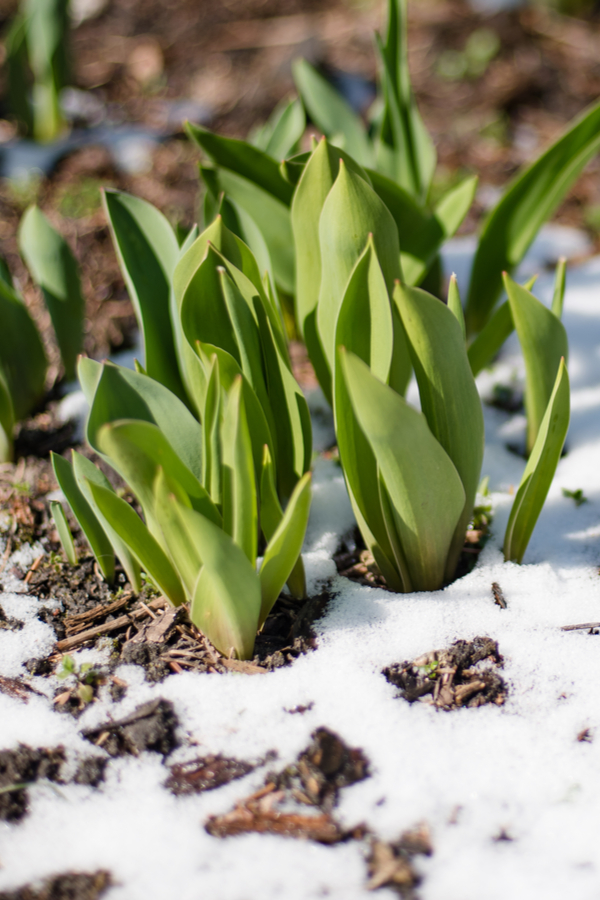
As soon as the soil starts to warm up in very early Spring, you will begin to see green sprouts begin to form where you planted your Fall bulbs. You may even find that as the snow melts, the foliage has already begun to rise out of the soil underneath the blanket of snow. Don’t be alarmed if you happen to get more snow after the foliage appears; they can handle a little bit of cold.
Mulching
You may wish to keep mulch around the flowers in the springtime to help discourage weeds, but keep it a few inches away from the stems to prevent mold growth.
Watering
Once the tulips have grown through the soil in the springtime, only water them in case of a severe drought Whatever rainwater they receive should be plenty to keep them blooming. Keep tulips away from irrigation systems as well since a moist bulb will equal a rotten bulb.
Remember, tulips don’t like a lot of moisture!
Fertilizing
You can choose to add a fertilizer specifically for bulbs or add some bone meal if you wish when sprouts emerge, but it isn’t required since the soil was amended when you planted.

Pests & Issues
A big issue with tulip bulbs is that they are a tasty treat for animals such as rodents, squirrels, rabbits, and mice. You may need to add some type of temporary fence or chicken wire to the top of the soil until you start to see the foliage start to grow in the Spring.
Aphids, snails, nematodes, and slugs are also problem pests for tulips as well.
The two main diseases that tulips encounter are bulb rot and gray mold, both due to excess moisture. Make sure to keep tulips as dry as possible.
Adding Supports
Most varieties of tulips do not require supports, but some of the larger hybrids with large blooms may benefit from some type of support in heavy rain and wind.
Cut Flowers
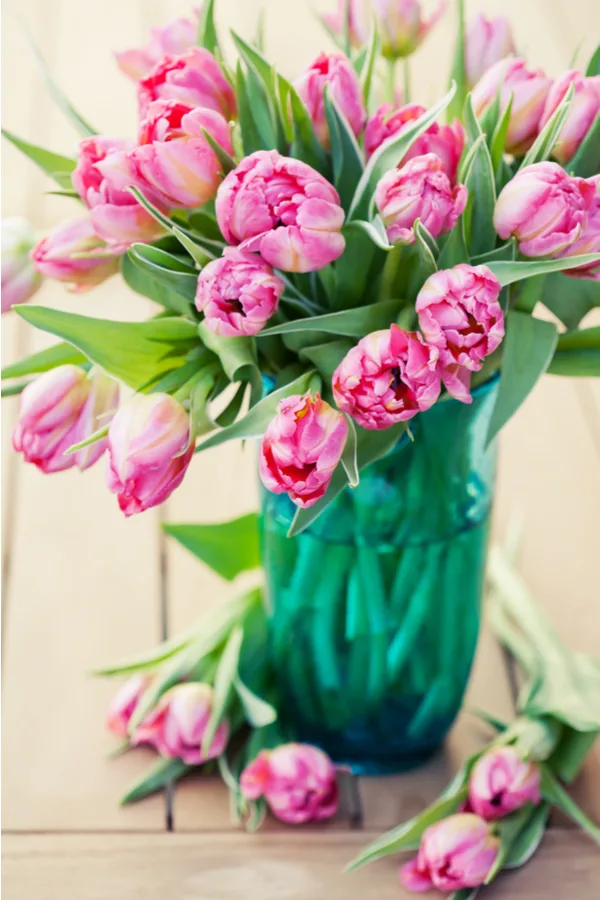
Tulip blooms are beautiful in bouquets and as cut flower arrangements! It is best to choose young blooms that aren’t fully opened yet.
Cut stems diagonally and immediately place in cool water. Change the water every day, and make sure to give the stems a slight trim.
Use a vase that will support the height of the stem so it won’t droop and remove any leaves that are at the waterline. Keep the vase away from heat and sunny places. They should stay fresh for 7 to 10 days if cared for properly.

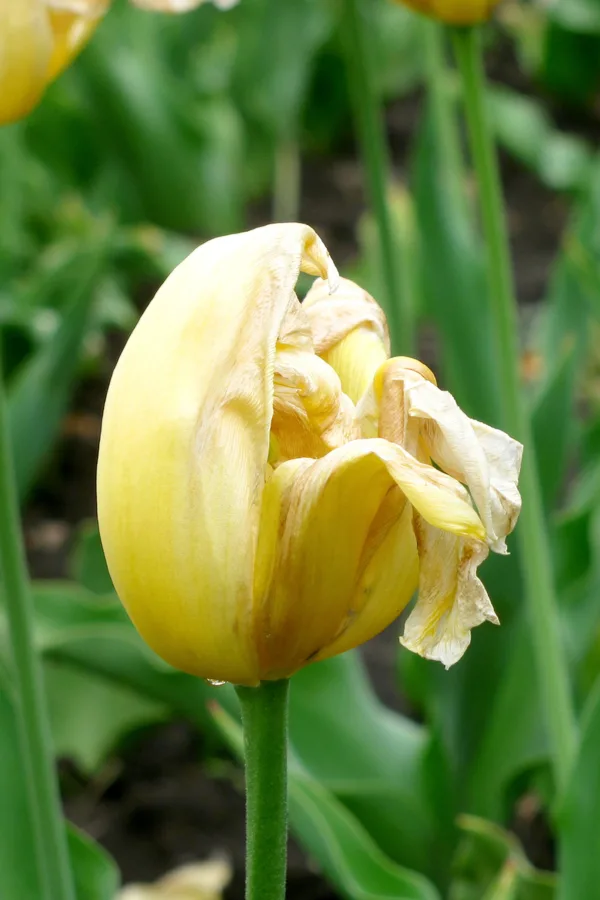
After Bloom Care
In order to help tulip bulbs return the next year, you should make sure to deadhead spent blooms before they go to seed. It might sound counterintuitive, but you are wanting the plant to put its energy into the bulb for next year and not into seeds.
Wait until the blooms start to die off and cut only the spent bloom off with a pair of sharp gardening shears. Do not cut the green foliage or the stem. The green foliage is needed to gather energy for next year’s blooms.
After a few weeks, the foliage will start to yellow and brown and die back as well. It is now safe to cut the rest of the tulip plant back to the ground.
Adding in a bit of compost into the top layers of the soil after the tulips are cut back will help nutrients get absorbed into the soil for next year.
To Conclude…
Seeing the dark green foliage start to emerge from your Fall-planted bulbs is a wonderful announcement that the long, cold winter months are finally over and that summer is on its way. And by following this guide on how to plant and grow tulips, you will be able to enjoy their sturdy, upright blooms all Spring long!
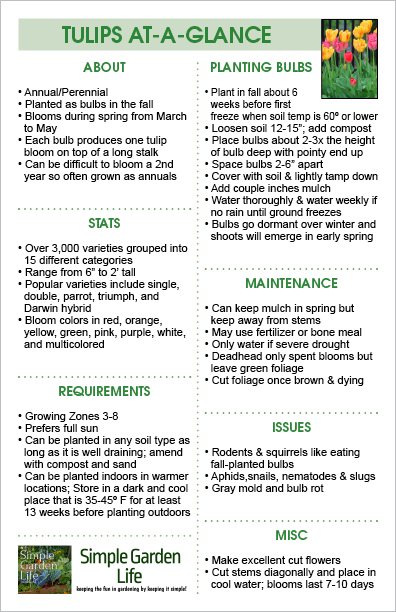
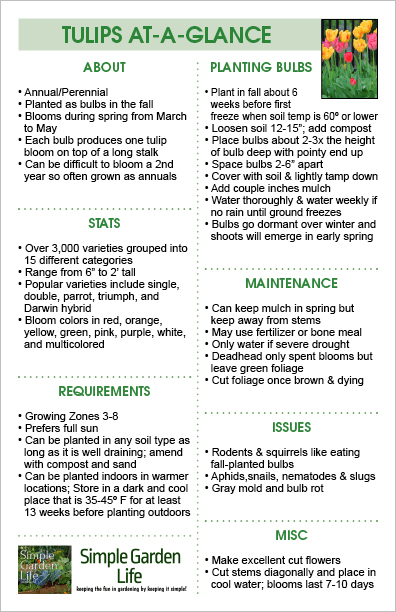
Feel free to download, print out, or save our Tulips At-A-Glance sheet. It is sized for half letter printing but can be scaled if needed.