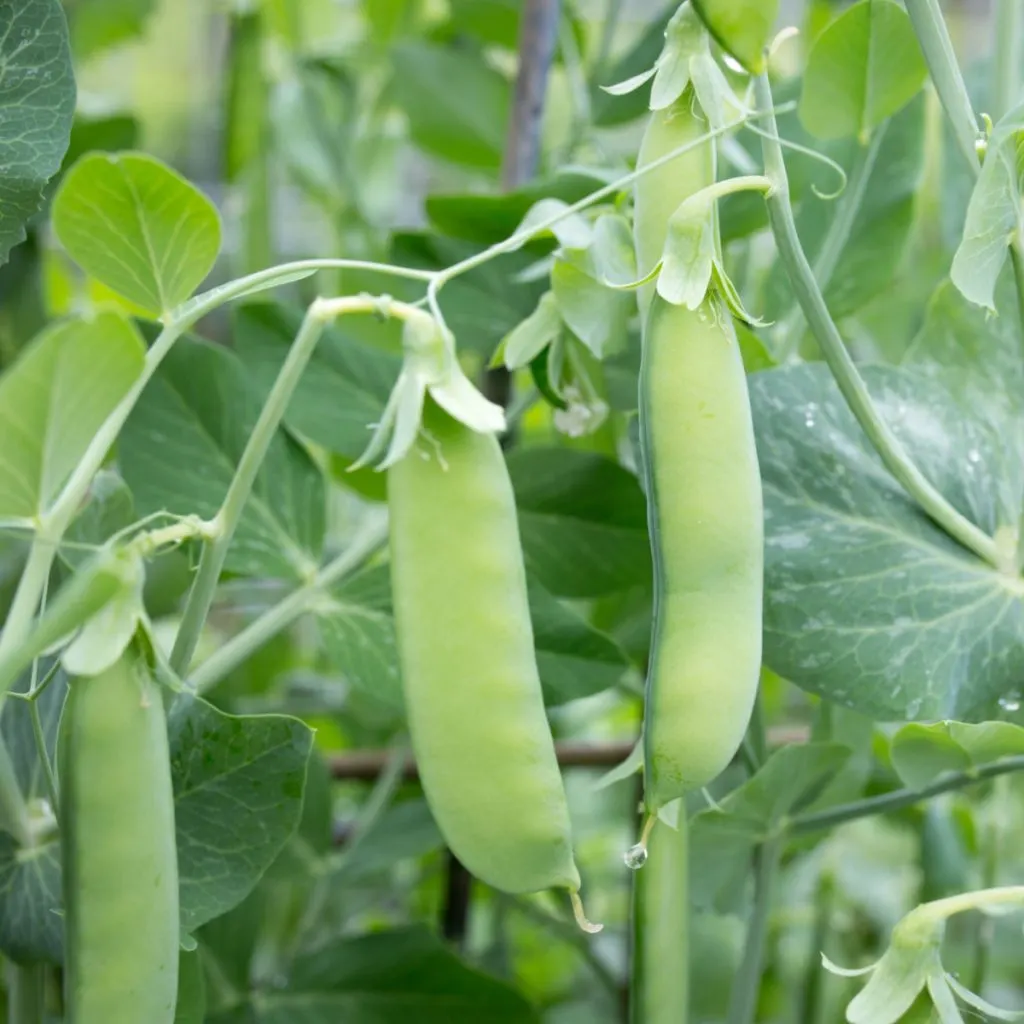
Sugar snap peas are not only one of the easiest of all vegetables to plant and grow – they also happen to be one of the first vegetables you need to plant in the early spring – all by simply directly sowing seeds right into the cool soil!
With their crispy, plump outer shells and sweet creamy peas inside, sugar snap peas are truly the ultimate delicious healthy snack. Peas happen to be a great supplier of vitamins C and K, and they are also a great source of fiber and protein too.
But let’s face it – it’s their delicious taste that really steals the show. In fact, they are so tasty to pick and eat fresh, that many gardeners find it a struggle to have any left to bring inside with all the snacking they do while harvesting!

But beyond their great flavor, there is another reason growing sugar snap peas is so wonderful for your garden -and that’s because the plants are also amazing for improving the soil’s health where they grow.
As a member of the legume family, sugar snap peas help to fix nitrogen levels in the soil as they grow. All while using up very few resources along the way. And by planting in the early spring or even for a late fall crop – they can have your soil ready to grow the next set of vegetable plants better than ever!
This is exactly why many gardeners plant field peas in late fall as a cover crop for their entire garden. See: How To Plant A Garden Cover Crop With Field Peas This Fall
How To Plant Sugar Snap Peas In Early Spring – Or Fall!
When To Plant
One of the best advantages of growing sugar snap peas is that you can plant them when the weather is still cool outside. Sugar snap peas like cooler soil and cool air temperatures – which is exactly why early spring and fall are the two ideal times for planting.
As soon as the weather rises to around 40° to 45º Fahrenheit and the soil can be worked in the spring, peas can be planted outside. The cooler temperatures actually help sugar snap pea seeds to germinate faster.
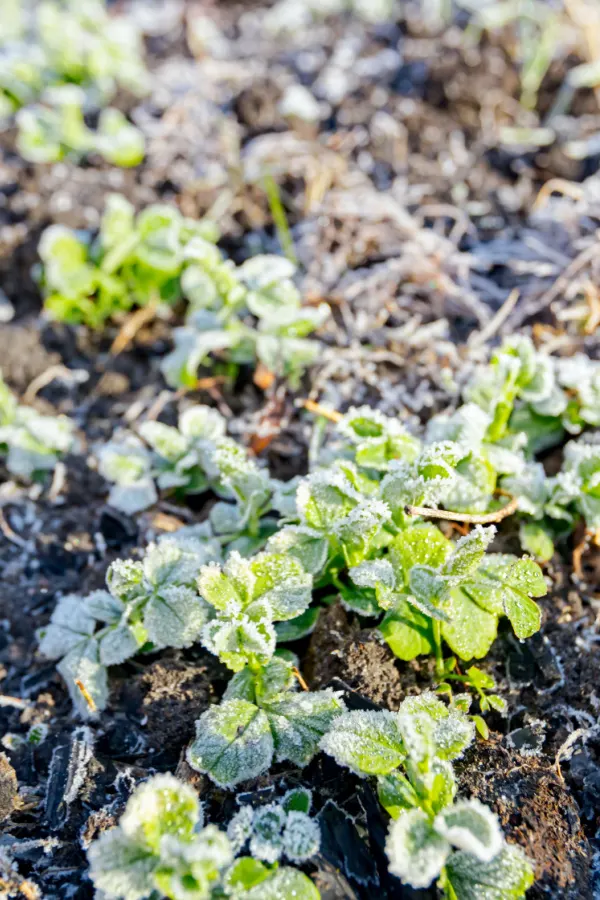
A good rule of thumb is that you need to aim to plant sugar snap peas about two weeks before your last frost date. This is because even after the seeds germinate, young seedlings can handle a bit of frost. Planting early also ensures the cooler soil and temperatures that peas need to grow and produce before the summer heat settles in.

For locations with cold winters, you can plant sugar snap peas again in late summer or early fall for a second harvest. For this planting, you will want to sow seeds in the ground about 8 to 10 weeks before the first frost date for your area.
No matter when you plant, there are a few keys to big success, the first of which is planting them in a sunny location.
Choosing A Planting Location – How To Plant Sugar Snap Peas In Early Spring
Sugar snap peas are perfect for direct sowing in traditional garden spaces. They can also be seeded quite easily to grow in containers and raised beds as well. To produce, they simply require a growing location that has at least 6 hours of direct sunlight each day.
As for the soil type, sugar snap peas don’t require extremely nutrient-dense soil. It’s actually more important that the soil be well-draining and loose. To achieve this, prior to planting, mixing compost into your planting area can help immensely with both of these key needs.


Planting Sugar Snap Peas – The Art Of Direct Sowing
There is no need for growing transplants with sugar snap peas. In fact, the crop performs poorly as a transplant, struggling to survive a second planting. Because of that, all you need to do is create a planting row – and drop in the seeds!
To start, create a small furrow about one inch deep and wide. Using the edge of a small handheld hoe is a great way to quickly make a perfectly sized furrow in your soil. Once the row is made, fill the trench halfway up (1/2 inch layer) with compost. (Affiliate Product Link: Edward Tools Carbon Steel Hand Hoe)
Place the seeds into the furrow down into the compost, spacing them one inch apart. If you are directly sowing more than one row, space rows 18 to 24 inches apart. This will allow you to have plenty of space to harvest between the rows. Finish by covering the seeds with soil and water well.
Each row of sugar snap peas should have some sort of trellis system in place before the seeds are sown. Although this isn’t required for the plants to grow, it allows the pea plants to stay tidy and produce more blooms. Maybe even more importantly – it makes harvesting much easier later on!
You can use anything from a simple hog panel or a piece of fencing – to a few posts with string wound between the posts as a support for sugar snap peas. Arbors, existing fences, netting, or wooden trellises also work well for peas to attach and climb. (Affiliate Product Link: BaseGoal All-Weather Trellis Netting Mesh)


Maintaining Your Crop – How To Plant Sugar Snap Peas In Early Spring
After the initial watering at the time of planting, only water the soil when it becomes overly dry. Peas don’t require a ton of moisture after they have successfully sprouted. If watering, water plants at the soil line to avoid getting moisture on the foliage. This can cause mold or mildew growth on the foliage.
Mulching around the base of the plants is a must. It will help to retain moisture and keep competing weeds at bay. The mulch also helps to keep the soil cooler once the warmth of summer arrives.
After sowing, add about an inch of shredded leaves or straw mulch to the planting area. Once the seeds have successfully germinated, add a few more inches around the plants to provide even more protection. Always be sure to avoid having the mulch directly touch the stems as it can rot the plants out.
One thing you will not need to do for your peas is fertilize them. They simply require little in the form of extra nutrients to produce. The compost that is in the planting trench is more than enough to supply the energy they need for good production.
Harvesting – How To Plant Sugar Snap Peas In Early Spring
Harvesting can be a bit tricky in the beginning to get just right. The real key to success is allowing pods to fill out – but not letting them stay on plants too long once they do.
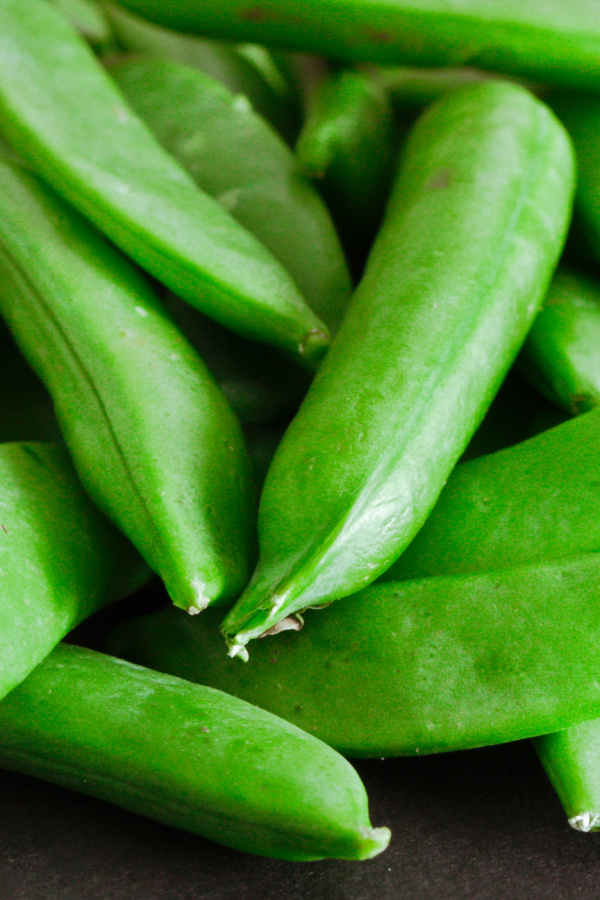

If you pick before they plump up, they will not be as sweet and flavorful. And waiting too long can result in tougher shells and less flavor.
Try to pick your pods in the morning. This is when they will be at their height of juiciness and water content. And whatever you do, pick often! The more often you harvest your sugar snap peas, the better. Once plants become too overloaded with peas, they will start to slow down or even stop producing new blooms.
Once temperatures start to consistently reach 80º F or above in the summer, the plants will begin to fade. As the warmer weather sets in, the plants will stop producing altogether. At this point they will start to bolt, resulting in the end of harvesting.
For sugar snap peas that were planted in the fall, they will die off with the first hard frost. Whether planting in the spring or fall, the spent plants are an excellent addition to your compost pile. For more information on crops to grow by directly sowing seeds, see The Best Way To Plant Zucchini This Year – Why Seeds Are Better Than Transplants!
Simple Garden Life
Follow Our Facebook Page For Even More Great Tips! Simple Garden Life Facebook Page
Simple Garden Life is a website dedicated to keeping gardening fun, simple and enjoyable! We publish two new articles each week along with a new garden podcast episode every two weeks. This article may contain affiliate links.