One of the easiest, best and least expensive ways to fill your flowerbeds with life and color is to divide the perennials you already have this spring into even more plants. Not only is it simple to do, it can save you hundreds of dollars on plants. And, of course, on mulch too!
Early spring is the perfect time to divide so many perennials. From hostas, daylilies and coneflowers, to ornamental grasses, coral bells, black-eyed Susan and more, nearly any leafing perennial can be split with success before or right as they begin to emerge for the season.
Although fall is often thought to be the best time for dividing and transplanting, early spring has quite a few advantages. Not just for your plants, but for you the gardener as well!

With that in mind – today’s article and corresponding podcast will take you through how to divide your plants this spring and why it can help you have less weeds – and have bigger, brighter and better blooming perennials this summer!
The Advantages Of Dividing Perennials In The Spring
So why is spring such a great time to get out and divide your existing plants? For starters, there is little foliage in the spring, making it easy to see the roots and to dig them out. Later in the summer and even into mid fall, it can often be hard to get to plants when they are covered in growth.
Even better, by dividing before the plants begin to leaf out in full, it allows you to dig in your new transplants early enough that they can still grow to full size and bloom in the summer and fall. And that can not only big color to your flowerbeds, but also help keep weeds out too!
One of the best ways of all to eliminate weeds and the endless chore of weeding is to fill your flowerbeds with more plants than mulch. It’s plain and simple, the more open areas of mulch you have, the more opportunity there is for weeds to be seen – and for new weed seeds to find a home.
Listen Below To Our Podcast Feature On How To Divide Perennials In The Spring!
Thick foliage from perennial plants can provide big protection for flowerbeds. It makes it hard for weed seeds to find a home, blocking the soil beneath. It also helps to shade the soil from the hot summer sun, keeping valuable moisture in place.
But perhaps best of all, filling your flowerbeds with plants means you need less mulch to cover open areas. And who doesn’t want to spend less buying mulch ever year – and in the process, eliminate nearly all of their weeding chores too!
Here is even better news – as good as creating free new plants is for the gardener, dividing your plants regularly is also excellent for the health of your plants. In fact, it is vital for keeping them healthy and blooming strong year after year.
Why Dividing Your Plants Regularly Is Important – How To Divide Perennials In The Spring
Regular division is certainly important for keeping plants manageable in your flowerbeds. When plants grow for too long, they often become massive balls of foliage. Not only can it be a bit unsightly, all of those leaves can mean little to no blooms as well.
When plants grow for too long their roots begin to grow together. As they do, it becomes tougher and tougher to absorb the water and nutrients they need from the soil. And without nutrients, they simply don’t have the power to produce buds and blooms.

But by dividing your perennials on a regular basis, you keep their root systems strong and healthy. And healthy roots mean stronger foliage up top, and more importantly, bigger and better blooms!
So how often should you divide perennials? In general, to keep roots from overcrowding, a good rule of thumb is to divide perennials every three to five years. You can certainly do it more often if desired. Especially if your goal is to create additional plants for your landscape.
How To Divide Perennials In The Spring
You can divide most perennials in the early spring as soon as the ground is workable. Perennials can handle freezes and frosts, but it is important that the soil around them is loose and not frozen when transplanting.
If you did not remove decaying foliage from your perennials last fall, now is the time to do it. Simply cut the dead leaves down to the base. Once all of the foliage has been removed, lightly brush back the dirt to find the outer edge of your plant.
It is always best to do this early enough before the plant has started to grow new leaves. Don’t worry, however, if the plant has started to send up shoots. You can still divide and transplant. Be aware it may kill off the new growth, but new leaves will eventually come up in a few weeks as the plant begins to grow.
Digging The Perennial Out & Splitting – How To Divide Perennials In The Spring
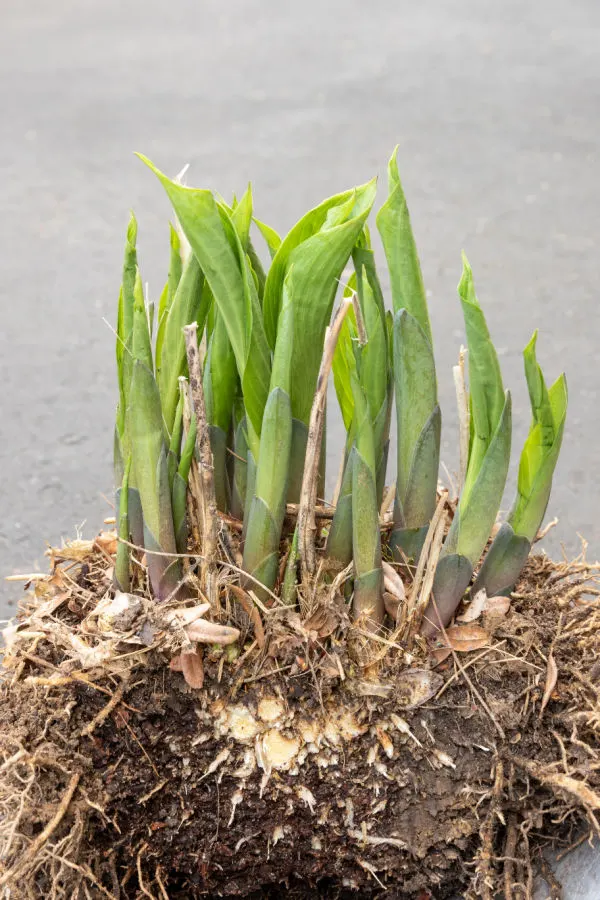
Now comes the easy part! Simply dig around the edges of the plant and lift out the root section. Always be sure to go down enough to get the center roots which are often a bit deeper. Once the plant is out of the ground, flip it over to reveal the root structure.

Although you can slice or cut down through the plant from the top, by turning it over, you will be able to more easily see the roots. This will allow you to cut more even sections than slicing down from the top.
For cutting, you can use a sharp shovel or a garden knife. We love using a Hori-Hori garden knife for this task. Garden knives have sharp serrated edges that slice through dirt and roots with ease. It really makes it easy for creating just the size you want.
As for the best size – it really depends on what you want from your plants. In general, larger division will create larger plants. But remember, larger plants will need to be dug up more often. Keeping root sections in 3 to 4 inch diameters is perfect for creating nice-sized plants that can stay in the ground for a good three to five years.
Planting Transplants – How To Divide Perennials In The Spring
It is best to always replant your divisions on the same day you dig them up. This allows the roots to begin to acclimate and re-grow quickly. It also protects the plant’s roots from drying out.
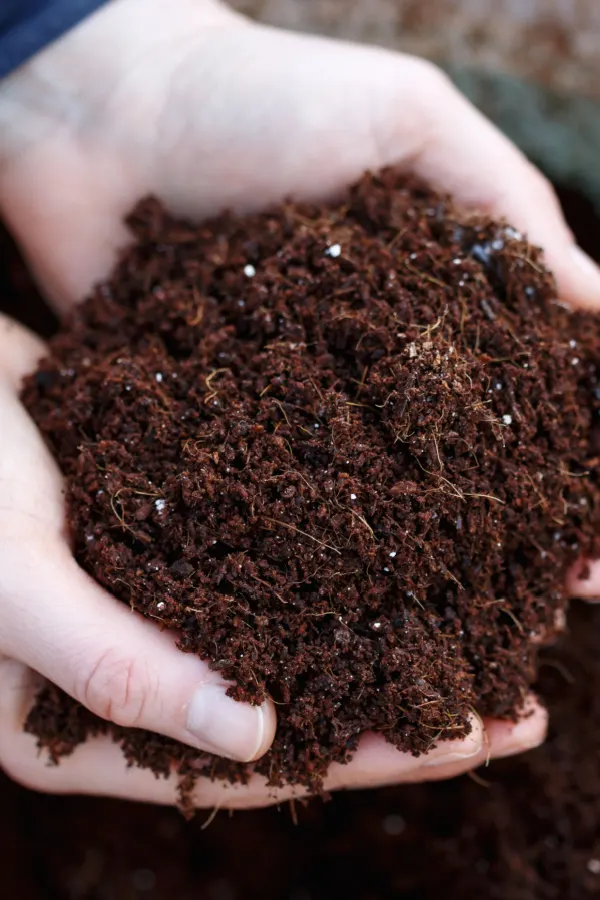
To plant, simply dig a new hole in your bed space twice the diameter of the transplant and a few inches deeper. Put a few inches of compost in the bottom of the planting hole and then place the transplant in the hole so that the top of the soil line is even with the top of the plant.

Fill in around the plant with a blend of 50% existing soil and 50% compost. This will provide a little energy to the roots and make it easy for them to expand quickly. Finish by watering the plant in and mulching – and get ready for your new plants to grow!
Creating A Holding Bed – How To Divide Perennials In The Spring
So what if you don’t happen to have space for all of your new plants? The answer is to create a holding bed in a corner of your garden or backyard.
Holding beds are great for placing in extra transplants. Keep them close together to save on space, and then when you need a plant during the season, you can simply dig it up and plant it. Holding beds are also great for having plants on hand to give to friends and family when they visit.
Here is to getting out into your flowerbeds early this spring and creating tons of new plants for your flowerbeds – and your friends, family and neighbors too!
Resource & Affiliate Product Links – How To Divide Perennials In The Spring
How To Cut Back & Divide Ornamental Grasses In Early Spring!
How To Divide Hostas In The Spring – Create New Plants For Free!
Potting Up Perennials – How To Create Gorgeous, Low Cost Planters!
Podcast Affiliate Product Links – How To Divide Perennials In The Spring
Follow Our Facebook Page For Even More Great Tips! Simple Garden Life Facebook Page
Simple Garden Life is a website dedicated to keeping gardening fun, simple and enjoyable! We publish two new articles each week along with a new garden podcast episode every two weeks. This article may contain affiliate links.
