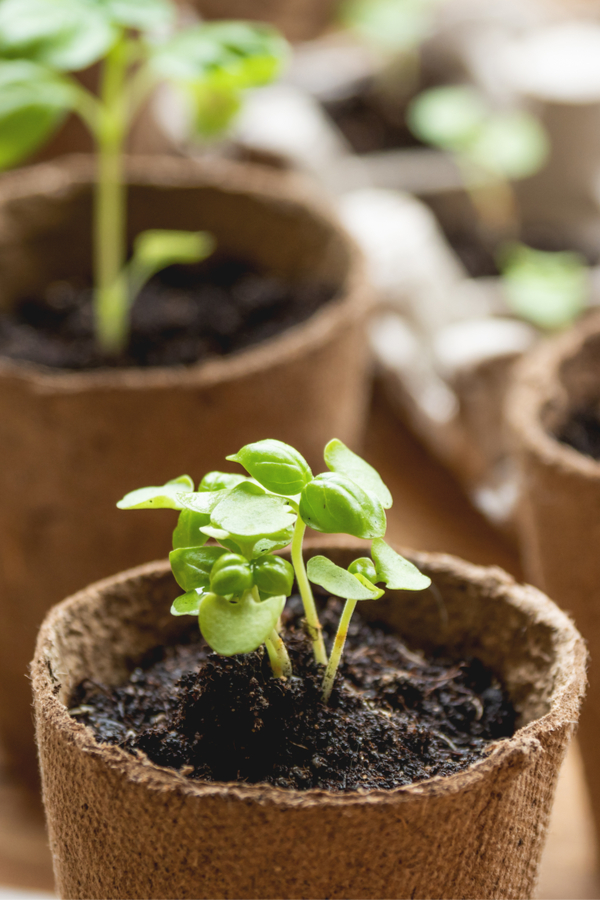
This week’s how-to garden article and corresponding podcast are all about starting your garden seeds indoors. Thankfully, it doesn’t have to be difficult or expensive to start your own vegetable and flower seeds.
While you can go to your local nursery or garden center to purchase transplants, there’s just something special and so rewarding about growing your very own plants from seeds.
The best part is that it doesn’t take a lot of expensive equipment or endless amounts of knowledge in order to start your own seeds indoors. We’ll go over everything from what type of materials you need, how to care for your young seedlings, and of course, getting the transplants ready to go into your garden in the spring!
Feel free to listen in to our complete podcast below on starting seeds indoors, or read on for our in-depth look on the subject in complete article form.
Why Start Your Own Seeds Indoors?
Let’s face it, purchasing transplants can get rather expensive, especially when you are talking about buying entire flats of plants! Meanwhile, it’s usually only a few dollars to purchase an entire packet of seeds.
In addition to the cost savings, you have more control over what varieties of plants you can grow in your garden. When you shop at garden centers, you are stuck choosing between the very few selections of plant varieties they offer. But when you purchase seeds, you can choose from a whole slew of exotic and unique varieties.
Growing your own plants also allows you to use heirloom seeds saved from a previous gardening season, letting you grow your favorite plant again and again. (To learn more about saving your own seeds from your vegetables, check out this article, “How To Save Vegetable Seeds From Your Garden For Planting Next Year!”)

Finally, starting your garden seeds indoors allows you to have your plants ready and on hand when the perfect planting day arrives. And we all know how hard it can be sometimes be to find a perfect weather day in the spring!
What You Don’t Need
Contrary to what you might see in stores or online, you don’t need to have expensive equipment in order to start your own seeds indoors. While there are a few must-have items, you don’t need to have lights that are marketed as “grow lights.”
The flower and vegetable seeds you grow simple don’t require or need the light spectrum provided with grow lights. You also don’t need to purchase heat mats to successfully grow seeds. As long as you have a moderately warm location, you will be able to germinate and grow seedlings like a pro.
You also won’t need to clear room on a window sill. In fact, using the sunlight that comes through a window will actually result in tall, thin, leggy plants. These plants likely won’t be able to stand up to the elements once they are planted outside. The sun just isn’t close enough to give those seeds the proper amount of light needed to grow strong and healthy.
What You Do Need
Now that you know what you don’t need to buy, here’s a look at the items that you will need to have on hand. Keep in mind that some of these items only need to be purchased once and can be reused year after year.
For starters, you will need some sort of light source. For this, basic 2 or 4 feet fluorescent or LED shop lights work wonders for getting seeds to germinate and grow.

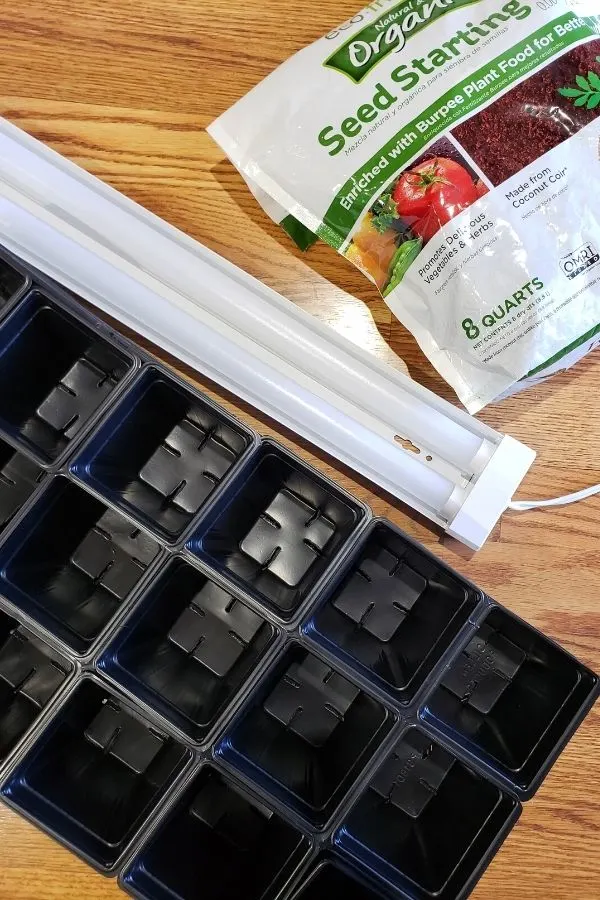
In addition to these lights, you will need a way of hanging or supporting the lights. Whether you hang the lights or prop them up with bricks or some other material, you will need to be able to adjust and raise the lights as needed. See The Best Lights To Use To Start Seeds Indoors – A Simple & Affordable Way To Start Plants!
To make things really easy, you can even create a little stand to hang your lights. This Tabletop Seed Starting Stand is a great example of that. It doesn’t take up a lot of space, but is a great way to hang shop lights for growing seeds.
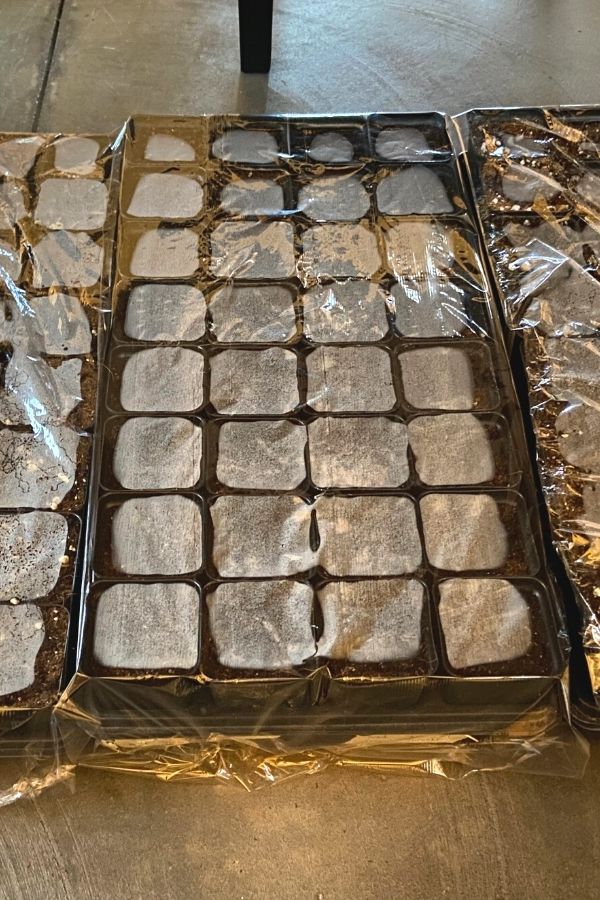
You will also need to have starting trays or containers, and some type of plastic wrap or cover to help keep moisture in when you first plant your seeds. And of course, there is the soil. There are pre-made seed starting soil mixes that you can purchase, or you can make your own. (more on that later in the article)
Ordering Your Seeds
If you plan to start your own seeds indoors, you might want to consider ordering your seeds and other supplies early because items may be limited or hard to find.
The last few years have put a bit of a strain on seed companies since more and more people have started gardening. This makes getting supplies a bit harder than in previous years. Aim to purchase your supplies early just to be on the safe side.
There are many different online seed companies that you can use to purchase seeds. Most start selling their supplies in the fall to get ready for the next year’s growing season. Companies such as True Leaf Market, Baker Creek Seeds, and Eden Brothers are all great, reputable online seed companies.

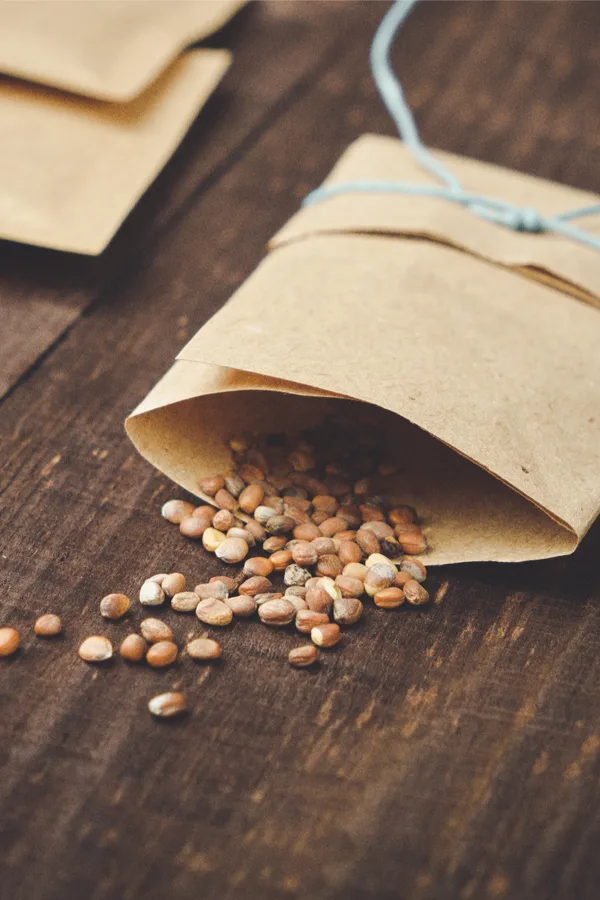
In addition to online seed companies, you can also find seeds in many home improvement stores and garden centers. You may want to even check with your local extension office, and some libraries have catalogs of seeds you can choose from for free.
When To Start Seeds Indoors
When to start seeds is usually the biggest question of all, but don’t let it overwhelm you. Starting your seeds all depends on your Last Spring Frost Date. This is the date that you want to plan on getting your transplants into the garden.
Most seen packets will have a date printed on the back that tells you how many weeks prior to your last spring frost date you need to start your seeds indoors. Typically, it is best to err on the side of giving your seeds more time as opposed to less time. Don’t forget to take into account time for actual germination.
When in doubt, aim for starting your seeds 8 weeks prior to your last spring frost date. Usually, 8 weeks will give you enough time to produce strong, solid growth before the plants will need to be outside permanently.
For example, if your last spring frost date is May 15th, you want to count back 8 weeks from then. This gives you a date of March 20th. Aim for starting your seeds around that date.
One Thing To Keep In Mind
Keep in mind that not all crops should be started indoors. Some plants actually need to be directly sown. These crops do not like their roots being disturbed, or they are just so easy to grow that they don’t need to be given a head start. Crops like peas, sweet corn, carrots, lettuce, dill, radishes and many flowers are direct sow plants.

How To Start Your Seeds Indoors
Seed Starting Soil Mix
You want to make sure that you use a high-quality seed starting soil mix. The soil needs to be lightweight and fertile. You can either buy pre-made bags of soil that is specifically made for starting seeds, or you can make your own (more on this below).
Do not use potting soil, garden soil, or topsoil alone. These soils are made specifically for mature plants and can actually burn delicate seedlings with heavy doses of fertilizers. Also, don’t use the soil-less mixes or those peat pellets that come with seed trays.
Making Your Own Seed Starting Soil Mix
You can easily make your own seed starting soil mix with just four simple ingredients: potting soil without fertilizer, finely screened compost, perlite, and worm castings. A simple mixture of equal parts of all four ingredients will create the perfect seed starting soil mix.
Preparing Growing Cells
Next, you need to purchase the seed trays that you will be growing your seeds in. It is best to avoid 72 cell trays because they are just too small for the extended growth of plants. You will likely need to transplant those plants after just a couple weeks. The more you mess with a plant’s root system, the higher chances they won’t survive.
Instead, use trays that hold 24, 36, or even 48 cells. Make sure the cells have a tray that goes under the cells to catch any excess water drain off.
Before filling your growing cells, you should premoisten the seed starting soil mix. If you find that the water keeps beading off of the soil, try using warm water. The soil actually has an easier time absorbing warm water.
Fill your seed trays a few days in advance to allow the soil to settle in. Since the soil is light and airy, the soil will need a little bit of time to settle down into the cells. Top cells off with additional soil prior to planting if needed.
Planting The Seeds – How To Start Seeds Indoors
Now it’s time to plant your seeds! Make it a point to plant ¼ to ½ of your cells with multiple seeds. This will help ensure that enough plants will germinate to fill all of the cells.
For example, if you have 12 cells in total, place 6 individual seeds into 6 of the cells. In the other 6 cells, place two seeds in each, slightly apart but close to the center. If the seeds in one of your cells don’t germinate, you can transfer one of those extra seedlings to that cell.

Next, and this is an important one, label cells well. It is very easy to lose track of which seeds you planted into which cells if you don’t use a label. A simple popsicle stick works great for labeling cells.
Cover your tray with the plastic lid that came with the tray or just use a piece of plastic wrap lightly placed over the tray. Set trays in a warm location. At this point, you will not need to turn on your lights in order for the seeds to germinate. In fact, it can actually dry out the soil and slow down germination.
You should start to see condensation develop on the lid or plastic. This indicates that the cells have enough moisture for germination. Once a few of the seeds have germinated, then you move trays underneath your light source and turn your lights on.
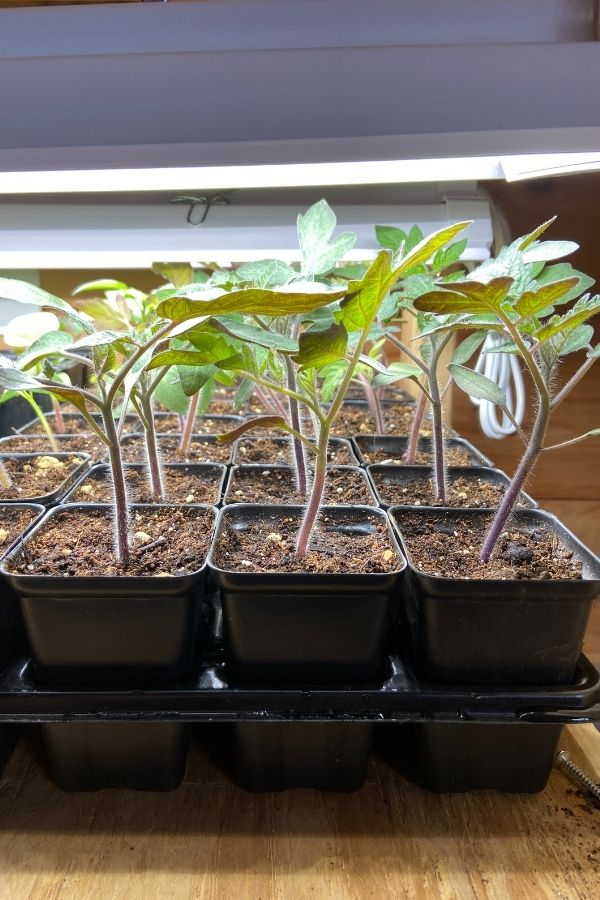
Maintaining Seedlings – How To Start Seeds Indoors
Proper Light Setup
In order for the seeds to grow properly indoors, you need the proper light setup. Hang your shop lights only about 1 to 2 inches above seedlings. While that might seem too close, it will allow the plants to grow strong and fill out without becoming thin and spindly.
You will need to move the lights up as the plants grow to maintain the 1 to 2 inch gap. Consider placing faster-growing plant varieties on one side of the light and angle lights if needed.
You will want to keep your lights turned on for 10 to 12 hours a day. Do not leave them on around the clock since this might burn plants. You can use an extension cord light timer to help ensure that the lights turn on and off at the right time. (Product Link: Outlet Surge Protector With 7 Day Digital Timer)
Watering
You want to keep the soil moist but not soggy. Do not allow the soil to dry out for long periods of time, but also keep from saturating it. Using a spray bottle to mist the tiny sprouts and soil works great early on. As plants grow, use a small bottle of water to water the cells as plants grow. Just be careful not to flood plants with a heavy stream or spray of water. Also, water at the soil level since young seedlings are pretty fragile.
Fertilizing
As plants grow, if they start to look less vibrant and the green starts to fade, they can be fertilized around week four. Use ½ or ¼ strength of organic liquid fertilizer. You can also use compost tea or worm castings tea, but make sure to keep the strength low.
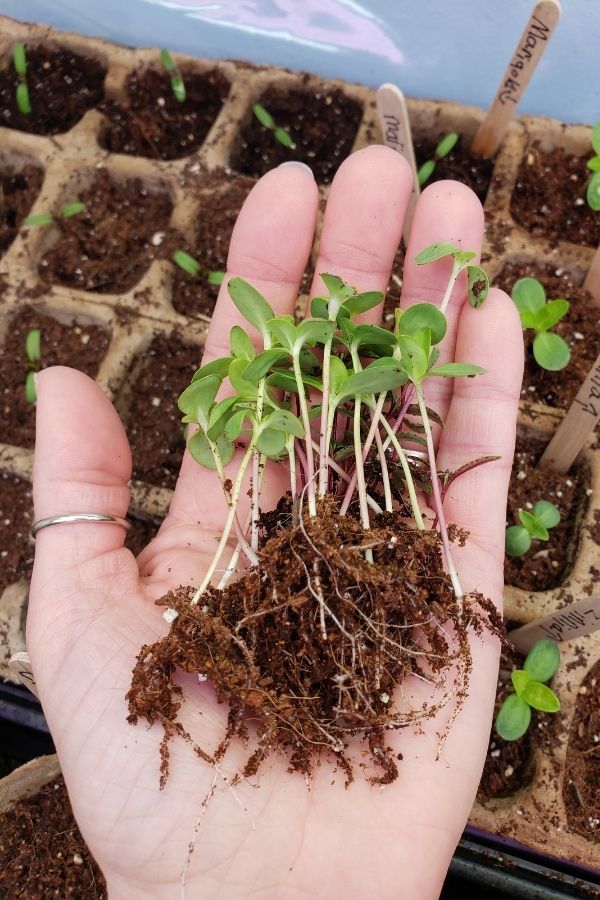
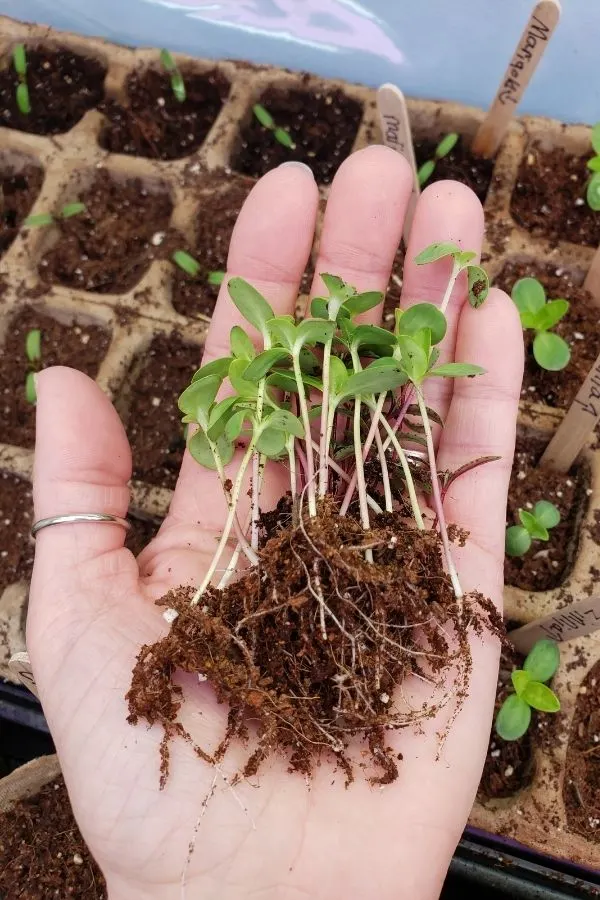
Thinning
After plants are around 1 to 2 inches tall, you will need to thin them so that you end up with one seedling per cell. It can often be difficult to remove a seedling that you’ve grown from seed. But only keeping one plant per cell allows that seedling to absorb all of the soil’s nutrients while allowing plenty of room for the roots to grow.
Hardening Plants Off Before Planting
One thing to avoid is to taking your plants directly from the indoors and planting them outside. Before planting can occur, those plants need a bit of time to adjust to the elements of the outdoors (sunlight, temperature swings, wind, rain, etc). This process is known as hardening off.
As temperatures warm up about two to three weeks before you want to plant, start to take your plants outside. Progress slowly, keeping them protected at first on a shady porch or patio. Be sure to avoid winds to begin with. Bring them indoors at night the first few nights.
Weather not cooperating at first? You can use a fan set on low speeds if outdoor conditions are unfavorable. Just point the fan at your indoor plants for a few hours each day. This will help to strengthen plants, even if you can’t get them outside right away. You will still need to harden them off outdoors before planting, however.
Gradually, allow the plants to be out longer and to get more direct sunlight and exposure to wind. Eventually, you can leave your plants outside around the clock as planting day approaches. Just be sure to bring them inside if there is a late-season frost or if cold temperatures are expected.
Now, the strong and healthy plants that you started, nurtured, and grew from tiny seeds indoors are ready to be planted!
Simple Garden Life is a website dedicated to keeping gardening fun, simple, and enjoyable! We publish two new articles each week along with a new garden podcast episode every two weeks.